Express-Session
Session代表服务器与浏览器的一次会话过程,这个过程是连续的,也可以使时断时续的。
Session代表服务器与浏览器的一次会话过程,这个过程是连续的,也可以使时断时续的。
1 | var MongoClient = require('mongodb').MongoClient, |
1 | var insertDocument = function(db,callback) { |
可以在连接时增加
1 | var MongoClient = require('mongodb').MongoClient |
1 | var updateDocument = function(db, callback) { |
也可以在连接时回调
1 | var MongoClient = require('mongodb').MongoClient |
1 | var removeDocument = function(db, callback) { |
1 | var MongoClient = require('mongodb').MongoClient |
1 | var findDocuments = function(db, callback) { |
1 | var MongoClient = require('mongodb').MongoClient |
Android代码
1 | DisplayMetrics dm = new DisplayMetrics(); |
1 | public static int dip2px(Context context,float dpValue) { |
1 | public static int px2dip(Context context,float pxValue) { |
1 | Resources.getSystem().getDisplatMetrics().density; |
最近开始全面转向Android Studio开发了,经常要去查快捷键,索性汇总下,自己方便查找
JCenter是Android Studio中repositories的默认节点。
当我们确定了移动APP的设计需求和APP产品设计流程之后,开始着手设计APP界面UI或是APP原型图啦。这个时候我们都要面临的第一个问题就是如何将信息以最优的方式组合起来?
LitePal是一款开源的Android数据库框架,采用了ORM对象关系映射的模式,将常用的数据库功能进行了封装。
再好的应用,也需要有人去发现他,我只是有那么一些途径,让我更快的找到它们而已。有网页,有微博,也有微信公众号,希望我的这些推荐可以让你更好的发现那些优秀、精美的应用。
系统信息0x2a45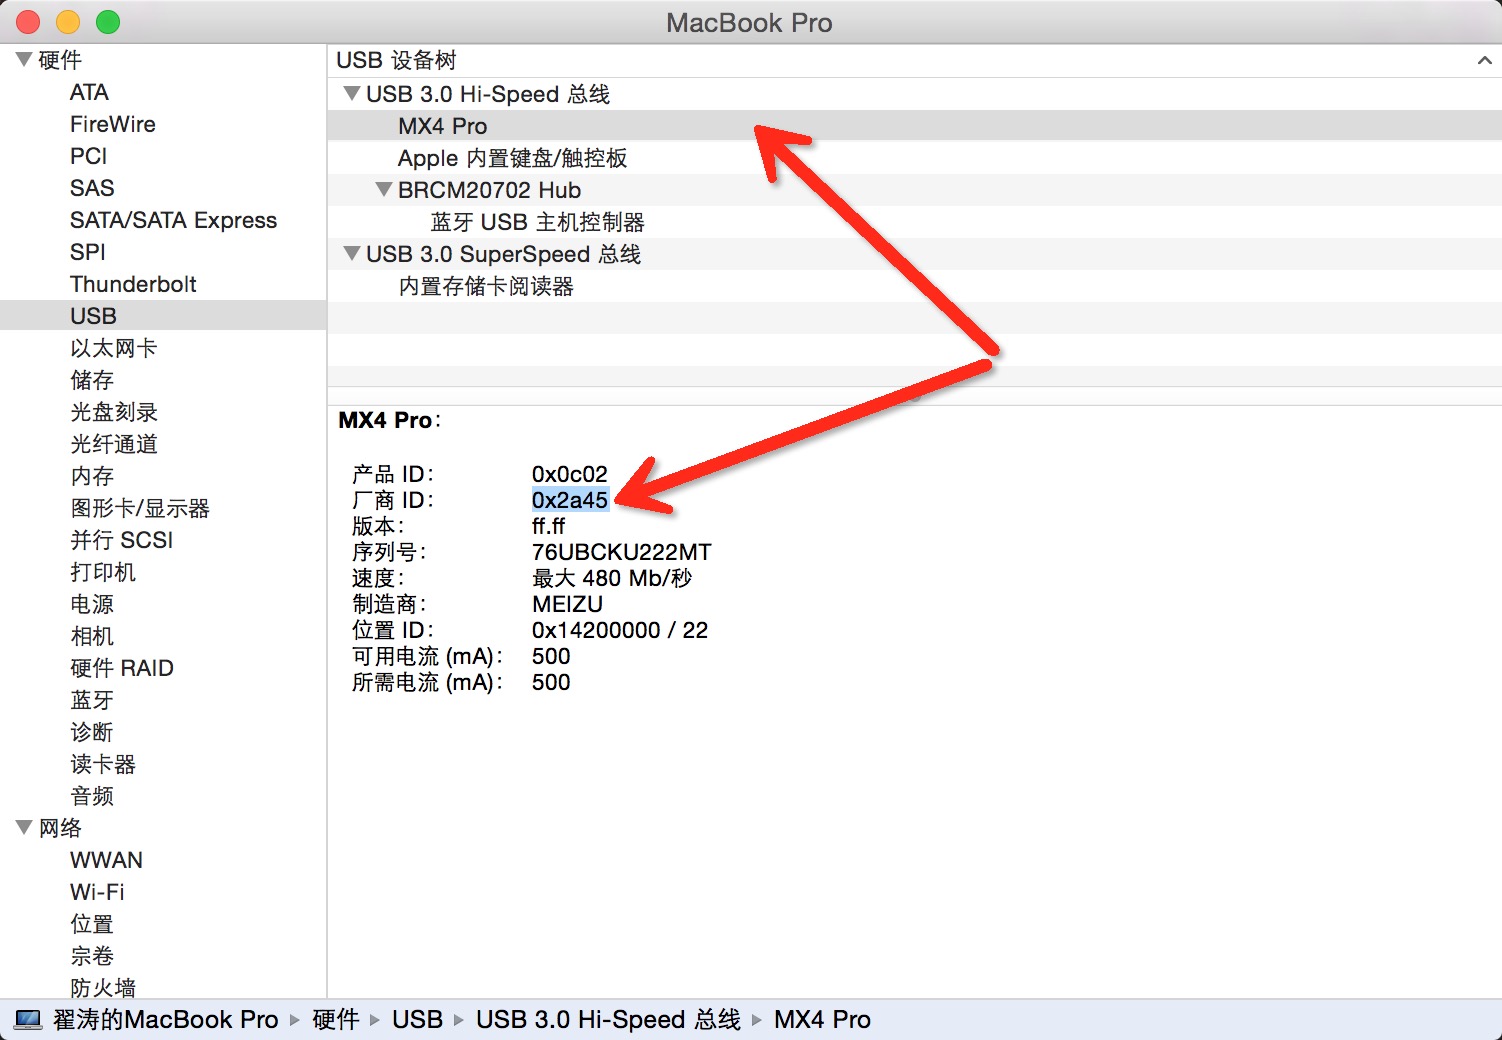
echo 0x2a45 >> ~/.android/adb_usb.ini
